

Let’s face it: costume season rolls around, whether it’s for Halloween, a themed party, a school play, or just some imaginative fun, and the pressure mounts. Store shelves groan under the weight of mass-produced outfits, often sporting hefty price tags and questionable quality. They’re convenient, sure, but where’s the personality? Where’s the triumphant feeling of making something truly yours?
This year, let’s ditch the frantic store dash and the pre-packaged predictability. It’s time to look closer to home – literally! Your house is a treasure trove of potential costumes waiting to be discovered. From the humble cardboard box to that old bed sheet lurking in the linen closet, everyday items possess incredible transformative power. Crafting a DIY costume isn’t just about saving money (though that’s a fantastic perk!); it’s an invitation to unleash your creativity, embrace sustainability, and create something genuinely unique and memorable.
This ultimate guide will walk you through the why and how of DIY costuming using simple household staples. We’ll explore brainstorming techniques, essential (and readily available) tools, and provide a wealth of detailed ideas to spark your imagination. Get ready to transform the mundane into the magical!
Why Go DIY with Everyday Items? The Amazing Benefits
Choosing to create your costume from things you already have isn’t just a last-minute resort; it’s a smart, fun, and rewarding choice with numerous advantages.
- ## Unbeatable Affordability: This is perhaps the most obvious benefit. Store-bought costumes, especially for multiple family members, can quickly drain your wallet. Accessories, wigs, and props often cost extra. By using household items, you drastically cut down expenses. Your main investment is time and a sprinkle of creativity, making it accessible regardless of budget. You might need a bottle of glue or some paint, but the core materials are often free!
- ## Championing Sustainability: In an era increasingly focused on reducing waste, DIY costumes are an eco-friendly champion. Fast fashion extends to costumes, with many polyester outfits worn once and then discarded, contributing to landfill problems. Repurposing old clothes, cardboard, plastic containers, and other household items gives them a second life, preventing waste and lessening your environmental footprint. It’s a fantastic way to teach kids about recycling and upcycling in a fun, practical way.
- ## Guaranteed Uniqueness: Ever shown up to a party only to find three other people wearing the exact same superhero outfit? With a DIY costume, that’s highly unlikely! Your creation will be born from your imagination and specific materials, ensuring it stands out. It reflects your personality, humor, and ingenuity in a way a store-bought costume rarely can. It’s a conversation starter and a testament to your creativity.
- ## Fostering Creativity and Problem-Solving: The process of figuring out how to turn a collection of random items into a recognizable (or abstract!) costume is a fantastic mental workout. It encourages thinking outside the box, experimenting with materials, and finding clever solutions to construction challenges. For kids, it’s an invaluable learning experience that boosts imagination, spatial reasoning, and problem-solving skills – all while having fun!
- ## Quality Family Fun & Bonding: Making costumes together can be a wonderful bonding activity. Brainstorming ideas, gathering materials, cutting, pasting, and laughing over mishaps creates lasting memories. It encourages collaboration, allows everyone to contribute their skills, and builds excitement for the event where the costumes will be debuted. The pride a child feels wearing something they helped create is immense.
- ## Perfect for Last-Minute Panics: Let’s be real – sometimes invitations pop up unexpectedly, or inspiration strikes late. Having the skills and mindset to whip up a costume from everyday items means you’re always prepared. No need for a desperate, late-night store run; a quick rummage through your closets and cupboards can often yield surprising results.
Getting Started: Your DIY Costume Toolkit & Inspiration Station
Embarking on your DIY costume journey is easier than you think. It starts with an idea and a willingness to see potential in the ordinary.
- ## Brainstorming Bonanza: Finding Your Character:
- Look Around: What movies, books, or games are you or your kids currently obsessed with? Characters are a great starting point.
- Think Concepts: Go beyond specific characters. Consider ideas like “static cling,” “raining cats and dogs,” “bubble bath,” or abstract concepts like “night sky.”
- Pun Power: Puns make for hilarious and often simple costumes. Think “ceiling fan” (wear a sign saying “Go Ceilings!”), “smartie pants” (glue Smarties candy rolls to trousers), “iron chef” (wear an apron, chef hat, and carry an iron), or “social butterfly” (pin social media logos to wings).
- Objects & Animals: Transform into a robot, a gumball machine, a traffic light, a cat, a jellyfish, or a scarecrow. Everyday objects and familiar creatures are often easy to replicate with basic shapes and materials.
- Iconic Figures: Consider historical figures (Rosie the Riveter, Albert Einstein) or recognisable types (tourist, detective, artist).
- Inventory Check: Sometimes, the items inspire the costume. Got a giant cardboard box? Robot, car, or dice! Lots of old white sheets? Ghost or mummy time! Found some green clothes and bubble wrap? Maybe a bunch of grapes or a swamp monster!
- ## Scavenger Hunt: Unearthing Your Materials: Before buying anything, raid your own home! You’ll be amazed at what you find:
- Cardboard Boxes: The MVP of DIY. Cereal boxes, shipping boxes, shoe boxes – endless possibilities for bodies, heads, props, and armor.
- Old Clothes: T-shirts, sweatshirts, leggings, jeans, button-down shirts, dresses, skirts. Look for specific colors or items that can be cut up, painted, or repurposed. Flannel shirts scream scarecrow or lumberjack; old suits can become zombies or historical figures.
- Bedding & Linens: Old white sheets are perfect for ghosts, mummies, and togas. Colorful sheets or blankets make instant superhero capes. Pillowcases can become heads or torsos for smaller costumes.
- Kitchen & Pantry: Aluminum foil (armor, robot details, crowns), paper plates (masks, shields, details), plastic cups/bottles (jetpacks, goggles, decorations), yarn (hair, spaghetti), plastic cutlery (quirky details), egg cartons (eyes, noses, textures).
- Craft & Office Supplies: Construction paper, felt, paint (acrylics work well on most surfaces), markers, crayons, glue (hot glue gun, white glue, fabric glue), tape (duct tape, packing tape, masking tape), safety pins, pipe cleaners, pom-poms, yarn, string, balloons, bubble wrap.
- Recycling Bin: Plastic bottles, jugs, cardboard tubes (paper towel/toilet paper rolls), newspaper, magazines.
- Accessories: Old hats, scarves, belts, sunglasses, jewelry, shoes/boots, gloves.
- ## Basic Toolkit (Likely Already On Hand):
- Scissors: A good sharp pair is essential. Fabric scissors are ideal for cloth, while sturdy utility scissors or a box cutter (adult supervision required!) work best for cardboard.
- Adhesives: Tape (various kinds) and glue (hot glue gun for quick, strong bonds; white glue for paper; fabric glue for no-sew fabric joining).
- Fasteners: Safety pins are invaluable for quick, temporary attachments, especially for capes or fabric adjustments. Staples can work in a pinch for paper or thin cardboard.
- Measuring Tools: Ruler or measuring tape for slightly more precise creations.
- Coloring Tools: Markers, crayons, paint and brushes.
Easy & Awesome DIY Costume Ideas from Everyday Items
Ready for some inspiration? Here are detailed ideas using common household materials. Remember, these are starting points – feel free to adapt and add your own creative flair!
-
## 1. Cardboard Box Wonders: Robots, Cars, and More!
- Materials: Large cardboard box(es), smaller boxes (cereal, tissue), tape (duct tape or packing tape), aluminum foil, bottle caps, plastic cups, markers or paint, scissors/box cutter.
- Robot: Find a box that fits comfortably over the torso. Cut holes for the head and arms. Use smaller boxes or tubes for arms/legs if desired. Decorate! Cover parts in foil for a metallic look. Use bottle caps, jar lids, and plastic cups for dials, buttons, and gauges. Draw or paint on details. A smaller box or a painted paper bag can serve as a helmet.
- Car/Truck: Similar to the robot, use a large box for the car body. Cut off the bottom flaps. Attach straps (duct tape, fabric strips, belts) to go over the shoulders so the wearer “stands” in the car. Cut out windows. Use paper plates painted black for wheels, smaller plastic lids for hubcaps, and plastic cups painted red/yellow for lights. Paint the body the desired color.
- Building/Dice: Paint a box like a LEGO brick, a building with windows, or a giant die. Simple, graphic, and effective.
-
## 2. Bed Sheet Spectacles: Ghosts, Togas, and Capes
- Materials: Old white or colored bed sheet(s), scissors, safety pins or fabric glue/tape, marker (optional), belt or rope (optional).
- Classic Ghost: The easiest costume ever! Drape a white sheet over the person. Mark where the eyes are, take it off, and cut out eye holes (make them large enough for good visibility). You can add jagged edges at the bottom for a spookier effect. For extra flair, use a black marker to draw a mouth or stitch/glue black felt circles around the eyes.
- Simple Toga: Use a white sheet. Drape it over one shoulder, wrap it around the body, and secure the loose end over the same shoulder with safety pins. Use a belt or rope tied around the waist to cinch it. Add a makeshift laurel wreath made from green paper leaves or actual leaves pinned to a headband.
- No-Sew Superhero Cape: Take a colorful sheet or blanket (red, blue, black are popular). Fold down the top edge by a few inches to create a channel. Secure this channel with safety pins or fabric glue/tape, leaving the ends open. Thread a ribbon or cord through the channel to tie around the neck (ensure it’s not too tight and has a quick-release mechanism for safety, especially for kids) OR simply use safety pins to attach the top corners of the sheet to the shoulders of a t-shirt.
-
## 3. Clothing Closet Transformations: Scarecrow, Zombie, Tourist
- Materials: Old clothes (flannel shirt, jeans/overalls, old suit/dress, Hawaiian shirt, khaki shorts), straw/raffia/shredded paper bags, makeup/face paint, accessories (hat, sunglasses, camera, fanny pack).
- Scarecrow: Dress in a flannel shirt and jeans or overalls. Use safety pins or fabric glue to attach patches of contrasting fabric. Stuff straw, raffia, or shredded brown paper bags into the cuffs of the sleeves and pants, and peeking out of pockets and the collar. Use face paint or eyeliner to draw stitches on the mouth and nose, and rosy circles on the cheeks. A floppy straw hat completes the look.
- Zombie: Find old clothes you don’t mind ruining. Rub dirt on them, tear holes, and fray the edges. Use red paint or makeup for “blood” stains (optional). Use face paint (grey, green, white) to create a pale, undead look. Add dark circles under the eyes and maybe some fake wounds using makeup or liquid latex (if available). Mess up the hair and practice your zombie shuffle!
- Tacky Tourist: This is all about clashing patterns and accessories. Wear a loud Hawaiian shirt (preferably over a t-shirt), Bermuda shorts or capris (khakis are classic), white socks pulled up high with sandals or sneakers. Add essential accessories: a straw hat or baseball cap, sunglasses, a camera slung around the neck, a map sticking out of a pocket, and maybe even a fanny pack. White sunscreen smeared on the nose is a perfect finishing touch.
-
## 4. Kitchen & Pantry Finds: Spaghetti, Grapes, and More
- Materials: Yarn (tan/yellow, red), red pom-poms or balloons, brown paper/felt, paper plates, green/purple balloons, green felt/paper, safety pins, glue, headband.
- Spaghetti and Meatballs: Wear a red shirt and pants/skirt. Cut tan or yellow yarn into spaghetti-length strands. Glue or safety pin bunches of yarn all over the shirt. Create “meatballs” by gluing red pom-poms or small red balloons among the yarn, or make them from crumpled brown paper/felt. A fun accessory is a colander worn as a hat!
- Bunch of Grapes: Wear a base layer of green or purple. Inflate numerous small green or purple balloons (don’t overinflate). Use safety pins (pinning from the inside of the shirt outwards, catching only the tied knot of the balloon) to attach the balloons all over the shirt, clustering them closely together. Cut leaf shapes from green felt or paper and attach them to a headband or around the neckline.
-
## 5. Office & Craft Supply Magic: Static Cling, Stick Figure
- Materials: Sweat suit or comfortable clothes (any color), socks, dryer sheets, safety pins, all-white or all-black clothing, black electrical tape or wide black marker, white paper plate, black marker, string/elastic.
- Static Cling: Wear a comfortable base outfit (pajamas or a sweatsuit work well). Using safety pins, attach various lightweight laundry items all over yourself – socks (especially mismatched ones!), small towels, maybe even a stray dryer sheet. Act slightly bewildered for full effect.
- Stick Figure: Dress head-to-toe in white clothing. Carefully apply black electrical tape along your arms, legs, and torso to create the lines of a stick figure body. For the head, draw a simple stick figure face (circle, two eyes, mouth) on a white paper plate. Punch holes on the sides and attach string or elastic to wear it as a mask. If you use all-black clothing, use white tape instead.
-
## 6. Punny & Playful: Simple Wordplay Costumes
- Materials: Basic clothing, cardboard/poster board, markers, safety pins, small items (candy, spices).
- Ceiling Fan: Wear sporty clothes (like a jersey or sweats). Make a sign or banner that reads “GO CEILINGS!” or simply “Ceiling #1 Fan” and pin it to your shirt. Carry pom-poms if you have them.
- Smarty Pants: Get a pair of old pants. Glue rolls of Smarties candy all over them. Simple and sweet!
- Spice Rack: (Group idea, or adapt for solo). Each person dresses in a specific color and makes a label with a spice name (“Paprika,” “Basil,” “Cumin”). Stand together to form the “rack.” For solo, attach several small (empty or sealed) spice containers or labels to a shirt or apron.
- Formal Apology: Wear formal attire (a suit, dress, or just a nice shirt and tie/bow tie). Create a sign that says “I’m Sorry” and wear it prominently.
-
## 7. Animal Kingdom Creations: Black Cat, Jellyfish
- Materials: All black clothing, black paper/felt, headband, black eyeliner, clear umbrella, iridescent/white/pink streamers or ribbons or fabric strips, tape/glue.
- Black Cat: The quintessential easy costume. Wear all black (leggings, t-shirt, dress). Cut two triangle shapes from black felt or sturdy paper and glue them to a headband for ears. Use black eyeliner to draw whiskers on your cheeks and a small triangle on your nose. A tail can be made from a stuffed black sock or a long strip of black fabric pinned to the back.
- Jellyfish: Wear white or light-colored clothing. Open a clear umbrella. Cut long strips of iridescent ribbon, white/pink streamers, thin fabric strips, or even bubble wrap. Tape or glue these “tentacles” to hang down from the inside edge and ribs of the umbrella. Carry the umbrella over your head – instant jellyfish! Adding battery-operated fairy lights inside the umbrella adds a magical bioluminescent touch.
-
## 8. Iconic Characters, Simplified: Rosie the Riveter, Where’s Waldo?
- Materials: Denim/chambray shirt, dark jeans/pants, red bandana, red lipstick (optional), red and white striped shirt, blue jeans, round glasses (real or paper cutouts), red/white beanie hat.
- Rosie the Riveter: Roll up the sleeves of a denim or blue chambray shirt. Pair with high-waisted dark jeans or trousers. The key accessory is a red bandana tied around the head with the knot positioned slightly off-center on top. Flex your bicep! Red lipstick adds to the iconic look.
- Where’s Waldo? (Wally): Find or make a red and white horizontally striped long-sleeved shirt. Pair it with simple blue jeans. Add round glasses (black frames). Top it off with a red and white beanie hat (often with a red pom-pom). Carrying a walking stick is optional but adds authenticity.
Related: 7 Unique Ways to Style a White Jean Jacket That Will Elevate Your Look
Taking It to the Next Level: Elevating Your DIY Costume
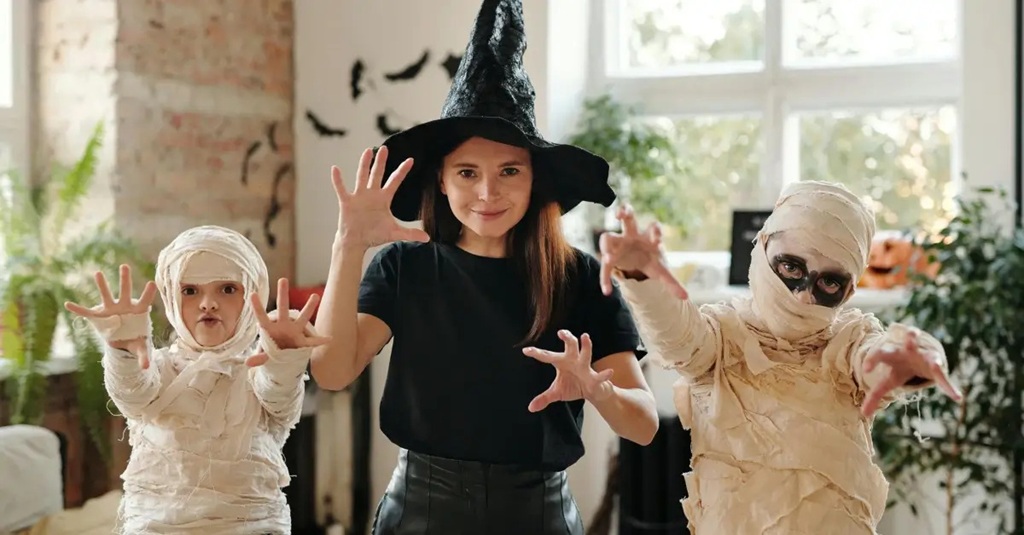
You’ve got the base – now let’s add the polish! Small details can make a huge difference.
- ## The Power of Accessories, Makeup, and Props: Don’t underestimate these finishing touches!
- Accessories: The right hat, glasses, scarf, belt, gloves, or jewelry can define a character. A pirate needs an eye patch; a witch needs a pointy hat; a detective needs a magnifying glass.
- Makeup/Face Paint: This is crucial for many looks – animals (whiskers, noses), spooky creatures (skeletons, zombies, vampires), clowns, or specific characters. Even simple eyeliner or lipstick can enhance the effect. Search online for easy tutorials for specific looks.
- Props: What does your character carry? A wizard’s wand (a painted stick), a chef’s spatula, a fairy’s wings (cardboard and glitter), a reporter’s microphone (cardboard tube and foil ball). Props complete the illusion.
- ## Master No-Sew Techniques: Don’t own a sewing machine? No problem!
- Hot Glue Gun: Your best friend for attaching embellishments, joining cardboard, securing fabric edges (use sparingly on thin fabrics), and creating quick structures. Be careful – it gets hot!
- Fabric Glue: Specifically designed for bonding fabrics without sewing. Great for hems, patches, and attaching fabric details. Allow proper drying time.
- Safety Pins: Perfect for temporary attachments, quick fixes, securing capes, and adjusting fit. Pin from the inside for a cleaner look.
- Duct Tape & Other Tapes: Duct tape is strong and comes in colors – great for cardboard constructions, creating metallic effects, or making quick patterns on clothing (like stick figure lines). Packing tape and masking tape also have their uses.
- ## Simple Sewing (Optional but Handy): If you can do a basic running stitch or hem stitch by hand, it can offer more durable results for fabric elements like capes or simple tunics. But it’s absolutely not necessary for most everyday item costumes.
- ## Safety First! Important Considerations:
- Visibility: Especially crucial for kids trick-or-treating at night. Ensure eye holes in masks are large enough. Avoid long, trailing elements that could be tripped on. Add reflective tape to darker costumes if they’ll be worn outdoors in the dark.
- Fit & Comfort: Make sure the costume allows for comfortable movement, sitting, and breathing. Avoid anything too tight or restrictive. Choose materials appropriate for the weather.
- Non-Toxic Materials: Use non-toxic paints, glues, and makeup, especially for items worn close to the skin or face. Check labels.
- Flammability: Be mindful of materials near open flames (like candles in jack-o’-lanterns). Avoid highly flammable materials or treat them with flame retardant if necessary (though sticking to safer materials is best). Sheets and cardboard can be flammable.
- Safe Accessories: Ensure props don’t have sharp edges. Neckwear (like capes or ties) should have a safety release or be easily removable, particularly for children.
Related: How to Style Oversized Shirt Men Like a Fashion Pro
People Also Ask (FAQs)
Here are answers to some common questions about crafting DIY costumes from everyday items:
What are the easiest DIY costumes?
Some of the absolute easiest include:
-
- Ghost: A white sheet with eye holes.
- Mummy: Wrap yourself in strips of an old white sheet or even toilet paper (though less durable!). Secure with tape.
- Tourist: Hawaiian shirt, shorts, socks with sandals, sunglasses, camera.
- Black Cat: All black clothes, paper/felt ears on a headband, drawn-on whiskers.
- Static Cling: Pin socks and small laundry items to your clothes.
- Superhero: Solid color clothes, a sheet/blanket pinned as a cape, maybe a paper mask.
How can I make a costume with absolutely no money?
Focus entirely on what you already own.
-
- Raid your closet: Create a “tourist,” “nerd” (glasses, buttoned-up shirt), “rock star” (ripped jeans, band tee, messy hair), or “sleepy person” (pajamas, slippers, teddy bear).
- Use bedding: Ghost, mummy, toga.
- Cardboard & paper: Robot body (unpainted), paper bag masks (animal, monster), stick figure (using marker on old white clothes if tape isn’t available).
- Repurpose trash: Carefully cleaned plastic bottles for a jetpack (unpainted), newspaper for paper-mâché masks (if you have flour/water for paste).
- Makeup only: Use existing eyeliner/lipstick to create animal features (cat, dog), a skeleton mouth, or clown makeup.
What household items can be used for costumes?
The list is vast! Key items include:
-
- Cardboard boxes (all sizes)
- Bed sheets, blankets, pillowcases
- Old clothing (T-shirts, jeans, shirts, dresses)
- Aluminum foil, paper plates, plastic cups/bottles/jugs
- Yarn, string, ribbon
- Tape (duct, packing, masking), glue (hot, white, fabric), safety pins
- Paint, markers, crayons
- Paper (construction, newspaper, bags), felt
- Accessories (hats, glasses, scarves, belts)
- Recyclables (cardboard tubes, egg cartons)
- Umbrellas, pool noodles, balloons
How do you make a last-minute costume?
Think simple and utilize clothes you already have.
-
- Identify a base: Start with a specific clothing item (e.g., a striped shirt for Waldo, a flannel for a scarecrow, all black for a cat).
- Focus on key identifiers: What 1-3 elements define the character? Cat ears and whiskers? A ghost sheet? A tourist’s camera and hat?
- Use quick no-sew methods: Safety pins, tape, and hot glue are your friends.
- Leverage makeup: Quick whiskers, zombie pallor, or superhero eye mask can transform an outfit instantly.
- Embrace puns: “Ceiling Fan” or “Smarty Pants” require minimal props.
- Go generic: Be a “sports fan” (jersey), “artist” (smock/apron, paintbrush), “chef” (apron, hat, spoon), or “detective” (trench coat, fedora).
Are DIY costumes safe for kids?
They absolutely can be, but require adult supervision and consideration during creation and wear:
-
- Ensure good visibility: Masks shouldn’t obstruct vision.
- Check for trip hazards: Avoid overly long capes or trailing parts.
- Use non-toxic materials: Especially paints, glues, and makeup.
- Comfort and fit: Make sure the child can move freely and isn’t overheating.
- Flame resistance awareness: Keep costumes away from open flames.
- Safe accessories: No sharp props; ensure neckwear is safe.
- Reflective elements: Add reflective tape for trick-or-treating.
Conclusion: Your House is Your Costume Shop!
Stepping away from the store-bought frenzy and embracing the world of DIY costumes using everyday items is more than just a budget-friendly alternative; it’s a gateway to creativity, sustainability, and genuine fun. It proves that imagination is the most valuable accessory you can have.
The next time a costume occasion arises, pause before you head to the mall. Take a walk through your own home with fresh eyes. See the potential in that cardboard box, the magic in that old sheet, the character hiding in your closet. Whether you craft a simple ghost, an elaborate robot, or a hilariously punny outfit, the process of creating something with your own hands (and household staples) is incredibly rewarding.
So, gather your materials, unleash your inner inventor, and get ready to craft costumes that are not only unique and affordable but also tell a story – the story of your own creativity. Happy crafting!